Today we are going to talk about teak Decking repairs, you can also get this information from http://wwww.wsyachtteakcarpentry.com
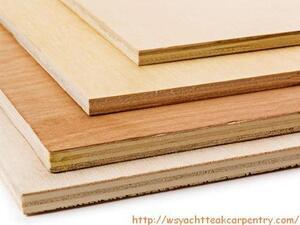
Teak decking repair is used on old decks that need to be sanded and oiled.
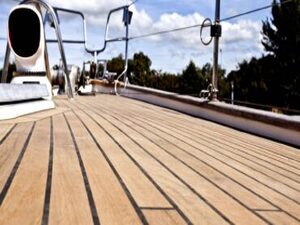
Vessels are made to be on water and to be under sun and water 24/7, that is why if you have teak decking in your boat, you should maintain your decks every season.
Today we will talk about Teak decking Caulking;
Step 1: Conditions:
Timing the job with the weather is important. Caulking can only be done when the teak decking is thoroughly dry and has been thoroughly dry for at least a week, because that is how long it takes for the wood to shrink. If you calk when the deck is at maximum shrink, then all it can do is expand and press on the caulking. If there is any moisture and the teak is not at maximum shrink when you caulk, then when it eventually dries out, and it will, the caulking will be in tension and you risk it pulling off the sides of the groove. Ideal conditions are not always possible but at least you know what is ideal.
Keep in mind as you establish the area you are going to re-caulk the Teak decking that you have to be able to reach every part of the work area from outside the perimeter later on when you are placing and smoothing the polysulfide. D
Use the scraping tool to dig into a good section and draw towards the loose (leaking) caulk to be removed. Separate each side then pull it out. Don’t throw it overboard – it will never degrade – drop it in one of those pails.
Step 2, Masking:
This is pretty straightforward. You need to be fairly precise but not too finicky.
There must be at least 2 inches of masked area each side of any place to be filled.
Step 3: Preparing the Polysulfide: for teak decking
Do this work on the dock if you can, it is very dangerous as any spill will be a total catastrophe and a dock disaster is better than a boat disaster. Take that cardboard box and cut an opening in it to make a work area. Leave about a 12 inch wall on the front and angle up 45 degrees on both sides to the top. Do all the mixing in the box.
Step 4: Caulking teak decking:
Place cartridge in the gun. BEFORE trimming the end and piercing the foil seal, pump the trigger on the gun and pressurize the plunger quite hard. This will force out any air bubbles trapped between the plunger and the liquid. Air bubbles are a nuisance because they continue to expand after you release the pressure and cause the cartridge to dribble all over the place.
RELEASE the pressure and trim off the end of the nozzle to leave a 45 degree hole about 3/16 inch diameter. Use a long nail or awl to prick the foil seal inside. Squeeze the stuff into the grooves. Work about 2 or 3 feet at a time, then squeegee the surface flush as necessary with the spreaders.
Step 5 and Fiinal for Caulking teak decking;
Stage 5, Removing the masking tape.
Removing the tape is much more critical than it would first appear. If you remove it too early, it will pull stringy bits off the groove which will fall onto the deck, and mess up the teak and nice caulk surface. If you remove it too late, the tape will be embedded in the caulk and become a mess to be trimmed with a razor later when it is fully set.
Now you are an expert on Calking teak decks, GOOD LUCK on your boat flooring project.